Introduction
This project was one of my earliest UX projects, but it took some pivoting to get there. In a couple of posts, I intend to go through the history of this project, what went wrong, (or at least not intended), what I learned, what I’d do differently, and maybe what I’m doing next.
History
My friend Geoffrey and I started this project almost 7 years ago, in early fall of 2014, as a way to collaborate on an industrial design project and make something “we thought was cool”.
It didn’t even start as a MIDI controller. It was originally proposed as a portable amplifier with a built-in audio interface for recording, with some basic looping and tracking capabilities for jamming with different analog instruments like guitars and keyboards.

Diagraming a “portable amplifier for recording” at Cartel coffee tempe in 2014.
Our process, although self-directed, was pretty thorough. I produced surveys asking musicians how they recorded music, what kind of gear they used, features they were looking for in an interface, etc.
I produced lists of real electronic components (amplifier circuits, input and output jacks, speakers, etc.) needed to fulfill different features to accomplish recording and performance tasks.
We produced study models with scale placeholders of components to determine the footprint and proportions of the device.
We produced sketches and made cohesive mood boards to build a visual language to apply to our final design.
During some working sessions, one of us squashed a study model a little, producing the parallelogram shape that eventually become the namesake of our collective efforts.


Geoffrey’s sketches are a lot better than mine and reflect where the “final” form ended up.

The “Nest thermostat style” rotary dial control with built-in screen was a prominent feature on the amp and can be seen in the top-facing view of this sketch.
Engineering :(
This is the stage where things got really difficult. We intended to make a working prototype of the amplifier that would fulfill several basic (and not so basic) functions such as sound amplification, multi-track looping, synth or sample triggering, and audio over USB.
I went deep in to maker land, researching electronics prototyping solutions to individual features, and ways of connecting those prototypes together to form the whole of our original idea. This involved a lot of diagraming, and a lot of Adafruit purchases.

The diagram that became my shopping list
Although we could get some of these systems to work individually, getting them to work together, was a different story all together. There was no software digital audio workstation at the time that could work on a Raspberry Pi computer board, fulfill our vision, and still communicate with our MIDI board. All this stuff is usually open-source, but a serious lack of software programming knowledge hampered us.
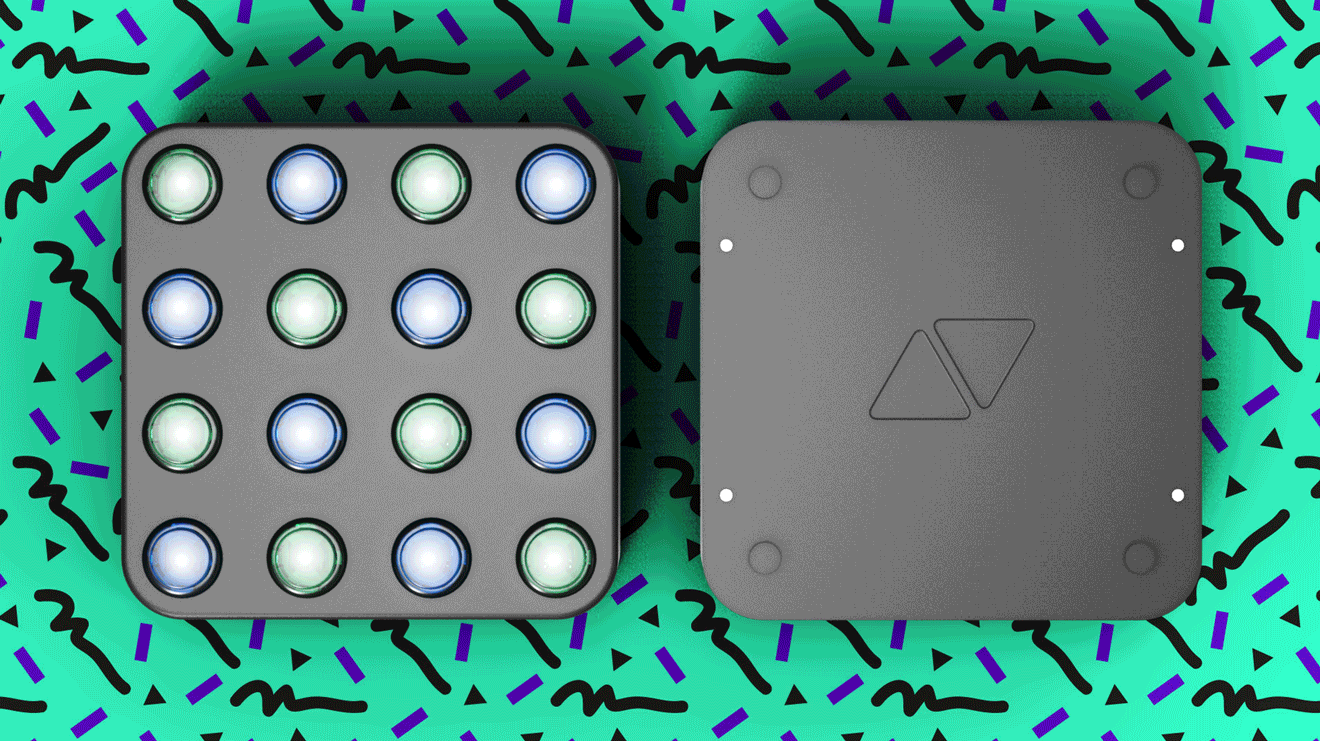
However, I could get one system to work, and that was the MIDI controller part. Originally intended to be a way of controlling the looping feature of the amplifier, the Livid Brain Jr. board was easy to program and yielded some immediate creative inspiration.
This little board enabled us to make something real, that worked, now.
The Pivot
Looking back, I’m not sure if there was an exact moment when the shift happened.
Despite having an entire CAD model of our original idea, with out the available time or affordable path forward, we began focusing on the MIDI controller as the basis for enabling better access to custom music production tools. We intended to re-visit the amplifier in the future.
In Part 2 I will go more in depth on the ideation and design of the MIDI controller kits.
Hindsight
I still stand by the idea of a portable amp for jamming and recording, especially one that caters to the sensibilities of electronic musicians rather than the traditional hot-rod aesthetics and guitar-centric sonics of typical instrument amplifiers.
We weren’t the only ones thinking about this.
The problem was that I thought about all the different products on the market and tried to shove them in to one magic box, and we weren’t prepared to build it.
Our original product was a victim of feature creep.
I should have asked better questions in my user surveys, to prioritize certain features, as opposed using them to validate all of the features at once.
Instead of dreaming of ways of connecting different systems, I should have focused on getting them functional, one at a time.
To take this even further, we could have outsourced some dedicated engineering resources to focus on figuring out those individual systems. This might have been costly at the time, but wouldn’t have been any worse than the investment we would have needed to eventually develop our entire product from scratch, if we had reached that point.
Part 2
In Part 2 I will re-cap the pivot to focusing on a customizable midi controller, the focus on off-the-shelf components, and rapid manufacturing.
In the meantime, here are some renderings of the original Parallel Amp.

Original 18 button design. Display is visible in the rotary dial on top of the amp.

I re-did the button layout and colors in early 2016.

Inputs and outputs in the rear panel. You can see the original 18 button panel on top in this version.

Line inputs detail. These could be used for 1/4” guitar jacks or microphone XLR cables.